# Blazor 实战系列(九)
终于要接近尾声了,上一篇基本上将文章模块的所有功能都完成了,整个博客页面也都完成了,本篇主要来美化几个地方,修修补补。
# 编辑器主题切换
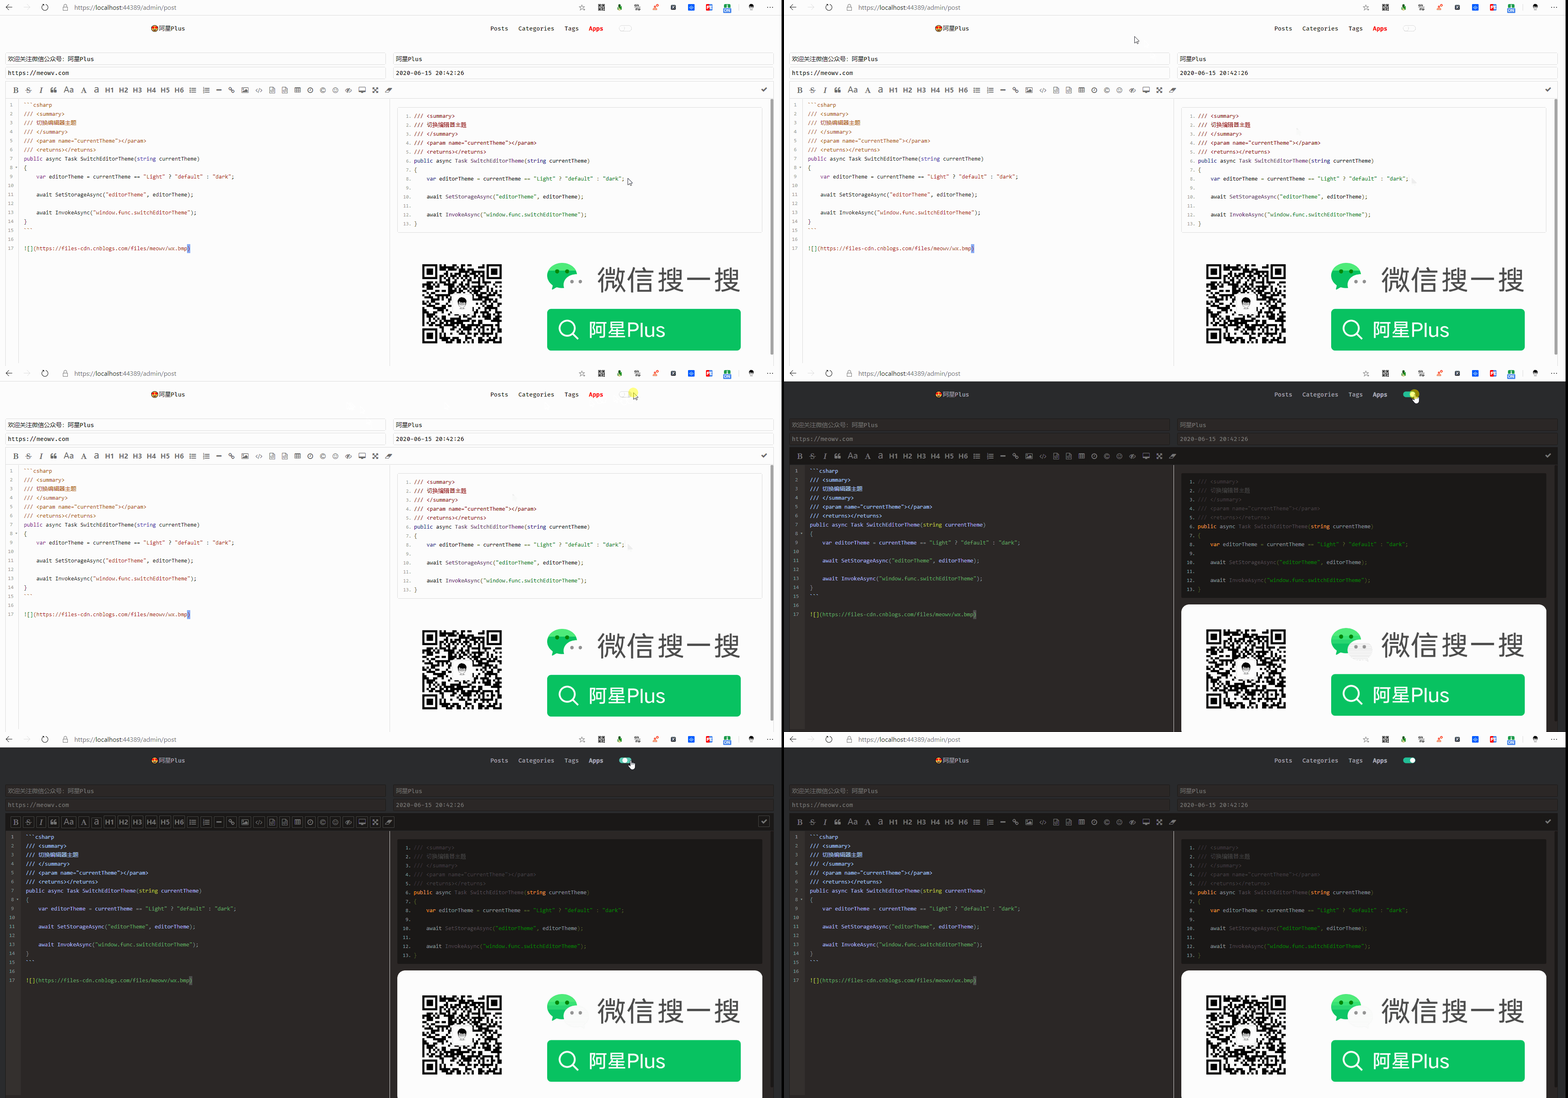
当我们新增和编辑文章的时候,默认编辑器是白色的,如果点击了头部切换主题按钮,我想要把编辑器主题颜色也做相应的改变该如何去实现呢?
刚好,editor.md是支持主题切换的,这就比较舒服了,直接按照要求调用对应的方法即可。
在app.js的renderEditor函数中我们已经自定义了三个参数theme、editorTheme、previewTheme,这三个参数就是来改变编辑器主题颜色的。
还是将值存在localStorage中,和我们博客的主题切换一样,这里叫editorTheme。
theme: localStorage.editorTheme || 'default',
editorTheme: localStorage.editorTheme === 'dark' ? 'pastel-on-dark' : 'default',
previewTheme: localStorage.editorTheme || 'default',
2
3
默认从localStorage中取数据,如果没取到的话,给对应的默认值。第二个参数有点特殊,用了一个三元表达式给不同的值。
然后在主题切换的时候也对编辑器做相应的调整即可。
打开Header.razor头部组件,找到SwitchTheme()切换主题的方法,添加一句await Common.SwitchEditorTheme(currentTheme);。
/// <summary>
/// 切换主题
/// </summary>
private async Task SwitchTheme()
{
    currentTheme = currentTheme == "Light" ? "Dark" : "Light";

    await Common.SetStorageAsync("theme", currentTheme);

    await Common.InvokeAsync("window.func.switchTheme");

    var uri = await Common.CurrentUri();
    if (uri.AbsolutePath.StartsWith("/admin/post"))
    {
        await Common.SwitchEditorTheme(currentTheme);
    }
}
2
3
4
5
6
7
8
9
10
11
12
13
14
15
16
17
将具体切换逻辑放到SwitchEditorTheme中,他接收一个参数currentTheme,用来判断是切换黑的还是白的。
/// <summary>
/// 切换编辑器主题
/// </summary>
/// <param name="currentTheme"></param>
/// <returns></returns>
public async Task SwitchEditorTheme(string currentTheme)
{
    var editorTheme = currentTheme == "Light" ? "default" : "dark";

    await SetStorageAsync("editorTheme", editorTheme);

    await InvokeAsync("window.func.switchEditorTheme");
}
2
3
4
5
6
7
8
9
10
11
12
13
切换主题之前拿到当前URI对象,判断当前请求的链接是否是新增和更新文章的那个页面,即"/admin/post",才去执行切换编辑器主题的方法,当不是这个页面的时候,编辑器是没有渲染出来的,如果也执行这段代码就会报错。
去看看效果。

# 文章详情页美化
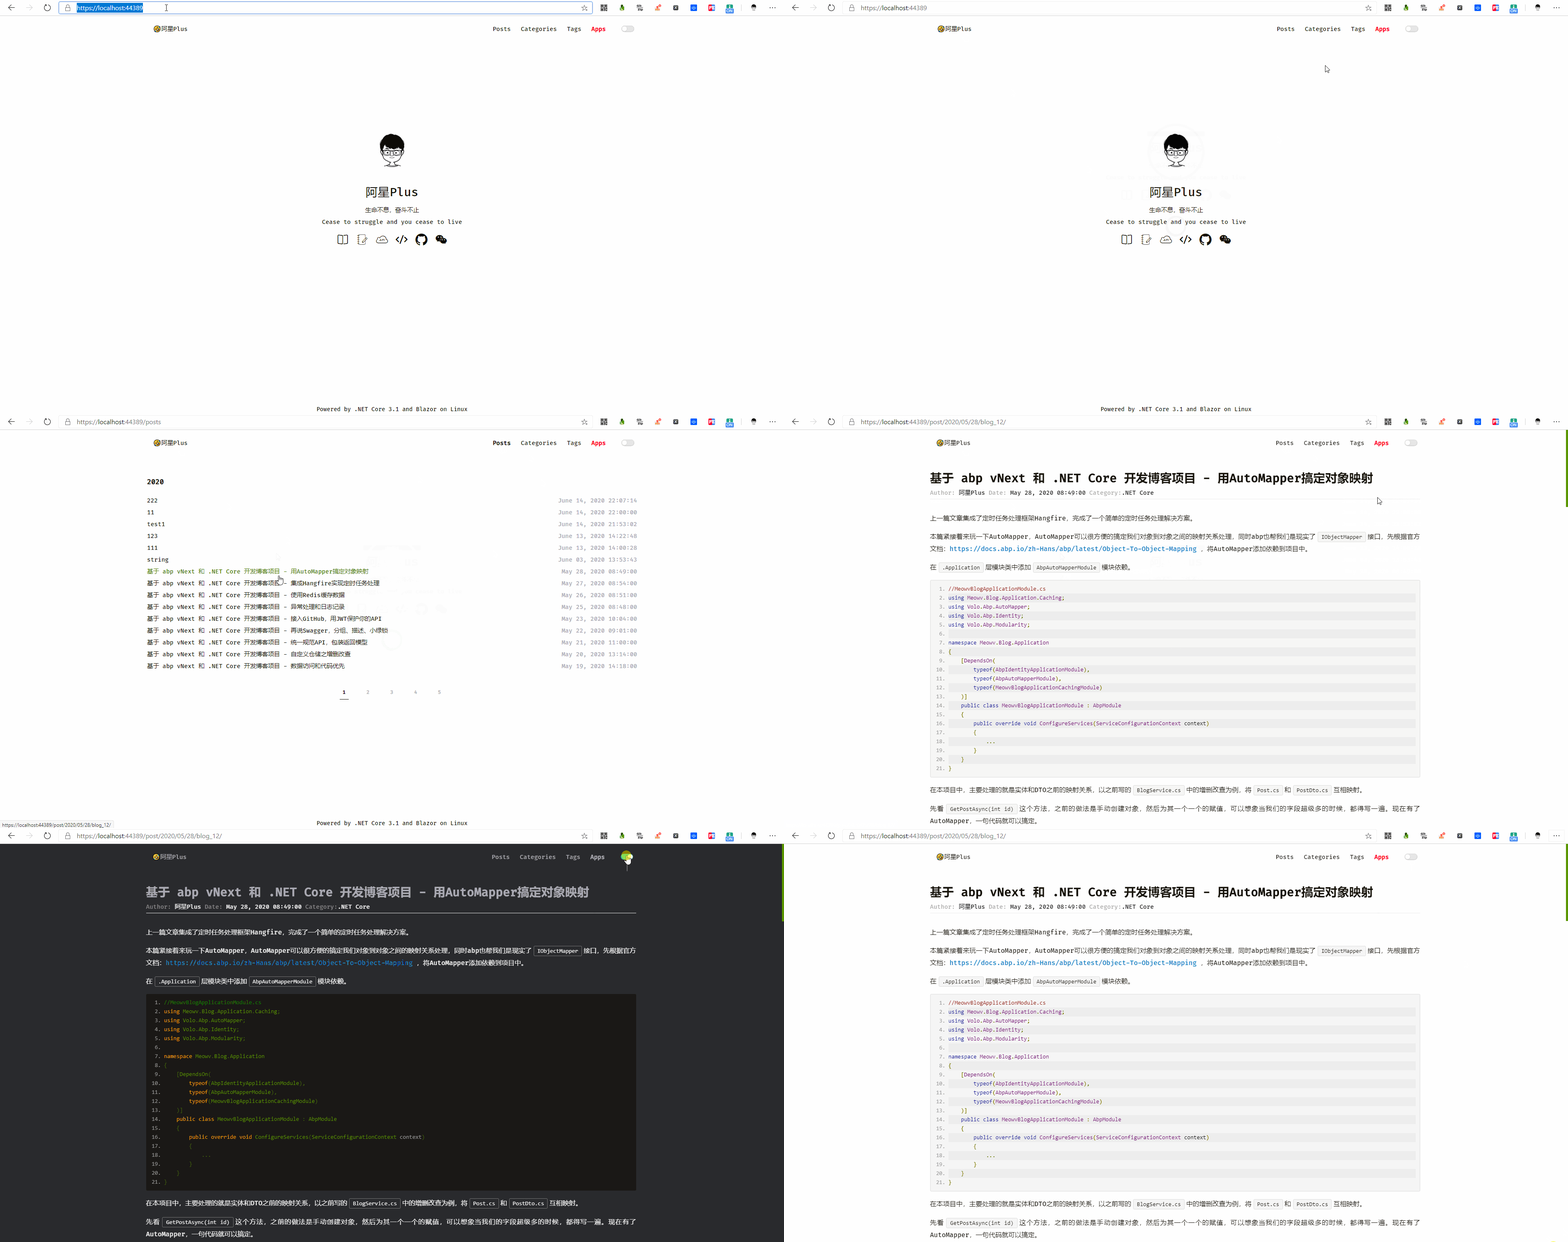
现在的文章详情页是没有将markdown格式渲染出来的,这里还是使用editor.md提供的方法,因为需要加载几个js文件,然后才能渲染样式。
所以还是在app.js添加一段代码。
renderMarkdown: async function () {
    await this._loadScript('./editor.md/lib/zepto.min.js').then(function () {
        func._loadScript('./editor.md/lib/marked.min.js').then(function () {
            func._loadScript('./editor.md/lib/prettify.min.js').then(function () {
                func._loadScript('./editor.md/editormd.js').then(function () {
                    editormd.markdownToHTML("content");
                });
            });
        });
    });
},
2
3
4
5
6
7
8
9
10
11
然后在文章详情页的组件Post.razor中修改代码,当数据加载完成后调用renderMarkdown即可,然后还需要引用一个css文件editormd.preview.css。
提供一下Post.razor最终的代码。
@page "/post/{year:int}/{month:int}/{day:int}/{name}"

<link href="./editor.md/css/editormd.preview.css" rel="stylesheet" />

@if (post == null)
{
    <Loading />
}
else
{
    @if (post.Success)
    {
        var _post = post.Result;

        <article class="post-wrap">
            <header class="post-header">
                <h1 class="post-title">@_post.Title</h1>
                <div class="post-meta">
                    Author: <a itemprop="author" rel="author" href="javascript:;">@_post.Author</a>
                    <span class="post-time">
                        Date: <a href="javascript:;">@_post.CreationTime</a>
                    </span>
                    <span class="post-category">
                        Category:<a href="/category/@_post.Category.DisplayName/">@_post.Category.CategoryName</a>
                    </span>
                </div>
            </header>
            <div class="post-content" id="content">
                @((MarkupString)_post.Html)
            </div>
            <section class="post-copyright">
                <p class="copyright-item">
                    <span>Author:</span>
                    <span>@_post.Author</span>
                </p>
                <p class="copyright-item">
                    <span>Permalink:</span>
                    <span><a href="/post@_post.Url">https://meowv.com/post@_post.Url</a></span>
                </p>
                <p class="copyright-item">
                    <span>License:</span>
                    <span>本文采用<a target="_blank" href="http://creativecommons.org/licenses/by-nc-nd/4.0/"> 知识共享 署名-非商业性使用-禁止演绎(CC BY-NC-ND)国际许可协议 </a>进行许可</span>
                </p>
            </section>
            <section class="post-tags">
                <div>
                    <span>Tag(s):</span>
                    <span class="tag">
                        @if (_post.Tags.Any())
                        {
                            @foreach (var tag in _post.Tags)
                            {
                                <a href="/tag/@tag.DisplayName/"># @tag.TagName</a>
                            }
                        }
                    </span>
                </div>
                <div>
                    <a @onclick="@(async () => await Common.NavigateTo("/posts"))">back</a>
                    <span>· </span>
                    <a href="/">home</a>
                </div>
            </section>
            <section class="post-nav">
                @if (_post.Previous != null)
                {
                    <a class="prev"
                       rel="prev"
                       @onclick="@(async () => await FetchData(_post.Previous.Url))"
                       href="/post@_post.Previous.Url">@_post.Previous.Title</a>
                }
                @if (_post.Next != null)
                {
                    <a class="next"
                       rel="next"
                       @onclick="@(async () => await FetchData(_post.Next.Url))"
                       href="/post@_post.Next.Url">
                        @_post.Next.Title
                    </a>
                }
            </section>
        </article>
    }
    else
    {
        <ErrorTip />
    }
}

@code {
    [Parameter]
    public int year { get; set; }

    [Parameter]
    public int month { get; set; }

    [Parameter]
    public int day { get; set; }

    [Parameter]
    public string name { get; set; }

    /// <summary>
    /// URL
    /// </summary>
    private string url => $"/{year}/{(month >= 10 ? month.ToString() : $"0{month}")}/{(day >= 10 ? day.ToString() : $"0{day}")}/{name}/";

    /// <summary>
    /// 文章详情数据
    /// </summary>
    private ServiceResult<PostDetailDto> post;

    /// <summary>
    /// 初始化
    /// </summary>
    protected override async Task OnInitializedAsync()
    {
        await FetchData(url);
    }

    /// <summary>
    /// 请求数据,渲染页面
    /// </summary>
    /// <param name="url"></param>
    /// <returns></returns>
    private async Task FetchData(string url, bool isPostNav = false)
    {
        post = await Http.GetFromJsonAsync<ServiceResult<PostDetailDto>>($"/blog/post?url={url}");
        await Common.InvokeAsync("window.func.renderMarkdown");
    }
}
2
3
4
5
6
7
8
9
10
11
12
13
14
15
16
17
18
19
20
21
22
23
24
25
26
27
28
29
30
31
32
33
34
35
36
37
38
39
40
41
42
43
44
45
46
47
48
49
50
51
52
53
54
55
56
57
58
59
60
61
62
63
64
65
66
67
68
69
70
71
72
73
74
75
76
77
78
79
80
81
82
83
84
85
86
87
88
89
90
91
92
93
94
95
96
97
98
99
100
101
102
103
104
105
106
107
108
109
110
111
112
113
114
115
116
117
118
119
120
121
122
123
124
125
126
127
128
129
130
131

到这里整个开发工作便结束了,这里只是一个小小的实战系列记录,没有深层次的剖析研究Blazor的所有使用方式。
如果本系列对你有些许帮助,便是我最大的收获,欢迎大家关注我的公众号:阿星Plus。