# 自定义仓储之增删改查
上一篇文章我们用Code-First的方式创建了博客所需的实体类,生成了数据库表,完成了对EF Core的封装。
本篇说一下自定义仓储的实现方式,其实在abp框架中已经默认给我们实现了默认的通用(泛型)仓储,IRepository<TEntity, TKey>,有着标准的CRUD操作,可以看:https://docs.abp.io/zh-Hans/abp/latest/Repositories (opens new window) 学习更多。
之所以实现自定义仓储,是因为abp没有给我们实现批量插入、更新的方法,这个是需要自己去扩展的。
既然是自定义仓储,那么就有了很高的自由度,我们可以任意发挥,可以接入第三方批量处理数据的库,可以接入Dapper操作等等,在这里贴一下微软官方推荐的一些EF Core的工具和扩展:https://docs.microsoft.com/zh-cn/ef/core/extensions/ (opens new window) 。
# 自定义仓储
在.Domain领域层中创建仓储接口,IPostRepository、ICategoryRepository、ITagRepository、IPostTagRepository、IFriendLinkRepository,这里直接全部继承 IRepository<TEntity, TKey> 以使用已有的通用仓储功能。
可以转到IRepository<TEntity, TKey>接口定义看一下

看看abp对于仓储的介绍,如下:
IRepository<TEntity, TKey> 接口扩展了标准 IQueryable<TEntity> 你可以使用标准LINQ方法自由查询。但是,某些ORM提供程序或数据库系统可能不支持IQueryable接口。
ABP提供了 IBasicRepository<TEntity, TPrimaryKey> 和 IBasicRepository<TEntity> 接口来支持这样的场景。
你可以扩展这些接口(并可选择性地从BasicRepositoryBase派生)为你的实体创建自定义存储库。
依赖于 IBasicRepository 而不是依赖 IRepository 有一个优点, 即使它们不支持 IQueryable 也可以使用所有的数据源, 但主要的供应商, 像 Entity Framework, NHibernate 或 MongoDb 已经支持了 IQueryable。
因此, 使用 IRepository 是典型应用程序的 建议方法。但是可重用的模块开发人员可能会考虑使用 IBasicRepository 来支持广泛的数据源。
对于想要使用只读仓储提供了IReadOnlyRepository<TEntity, TKey> 与 IReadOnlyBasicRepository<Tentity, TKey>接口。
仓储接口类如下:
//IPostRepository.cs
using Volo.Abp.Domain.Repositories;

namespace Meowv.Blog.Domain.Blog.Repositories
{
    /// <summary>
    /// IPostRepository
    /// </summary>
    public interface IPostRepository : IRepository<Post, int>
    {
    }
}
2
3
4
5
6
7
8
9
10
11
12
//ICategoryRepository.cs
using Volo.Abp.Domain.Repositories;

namespace Meowv.Blog.Domain.Blog.Repositories
{
    /// <summary>
    /// ICategoryRepository
    /// </summary>
    public interface ICategoryRepository : IRepository<Category, int>
    {
    }
}
2
3
4
5
6
7
8
9
10
11
12
//ITagRepository.cs
using System.Collections.Generic;
using System.Threading.Tasks;
using Volo.Abp.Domain.Repositories;

namespace Meowv.Blog.Domain.Blog.Repositories
{
    /// <summary>
    /// ITagRepository
    /// </summary>
    public interface ITagRepository : IRepository<Tag, int>
    {
        /// <summary>
        /// 批量插入
        /// </summary>
        /// <param name="tags"></param>
        /// <returns></returns>
        Task BulkInsertAsync(IEnumerable<Tag> tags);
    }
}
2
3
4
5
6
7
8
9
10
11
12
13
14
15
16
17
18
19
20
//IPostTagRepository.cs
using System.Collections.Generic;
using System.Threading.Tasks;
using Volo.Abp.Domain.Repositories;

namespace Meowv.Blog.Domain.Blog.Repositories
{
    /// <summary>
    /// IPostTagRepository
    /// </summary>
    public interface IPostTagRepository : IRepository<PostTag, int>
    {
        /// <summary>
        /// 批量插入
        /// </summary>
        /// <param name="postTags"></param>
        /// <returns></returns>
        Task BulkInsertAsync(IEnumerable<PostTag> postTags);
    }
}
2
3
4
5
6
7
8
9
10
11
12
13
14
15
16
17
18
19
20
//IFriendLinkRepository.cs
using Volo.Abp.Domain.Repositories;

namespace Meowv.Blog.Domain.Blog.Repositories
{
    /// <summary>
    /// IFriendLinkRepository
    /// </summary>
    public interface IFriendLinkRepository : IRepository<FriendLink, int>
    {
    }
}
2
3
4
5
6
7
8
9
10
11
12
在ITagRepository和IPostTagRepository仓储接口中,我们添加了批量插入的方法。相对于的在我们的.EntityFrameworkCore层实现这些接口。
创建Repositories/Blog 文件夹,添加实现类:PostRepository、CategoryRepository、TagRepository、PostTagRepository、FriendLinkRepository。
不知道大家发现没有,我们的仓储接口以及实现,都是以Repository结尾的,这和我们的.Application应用服务层都以Service结尾是一个道理。
在自定义仓储的实现中,我们可以使用任意你想使用的数据访问工具,我们这里还是继续用Entity Framework Core,需要继承EfCoreRepository<TDbContext, TEntity, TKey>,和我们的仓储接口IXxxRepository。
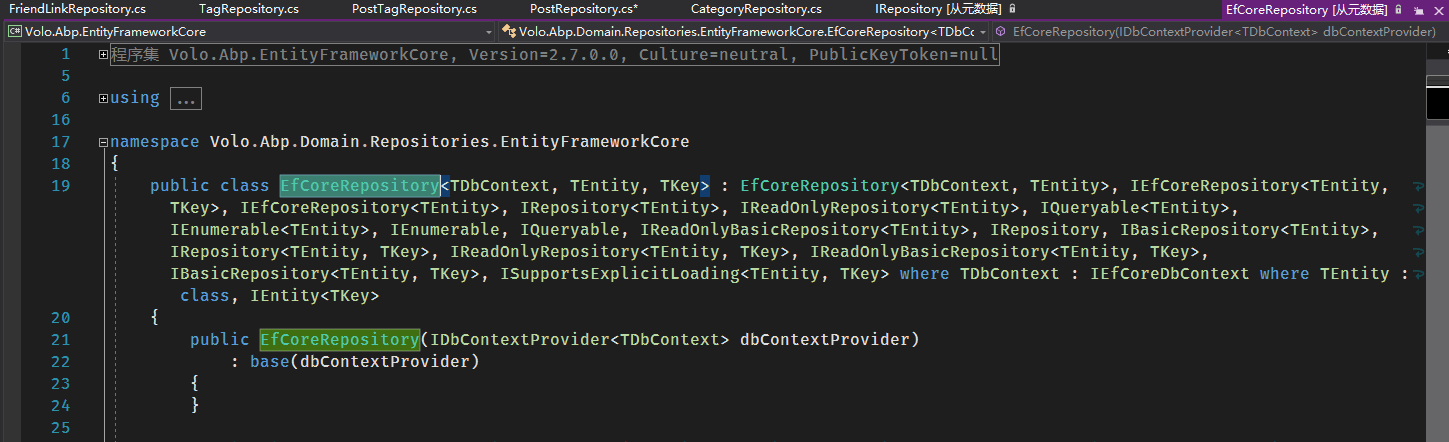
EfCoreRepository默认实现了许多默认的方法,然后就可以直接使用 DbContext 来执行操作了。
仓储接口实现类如下:
//PostRepository.cs
using Meowv.Blog.Domain.Blog;
using Meowv.Blog.Domain.Blog.Repositories;
using Volo.Abp.Domain.Repositories.EntityFrameworkCore;
using Volo.Abp.EntityFrameworkCore;

namespace Meowv.Blog.EntityFrameworkCore.Repositories.Blog
{
    /// <summary>
    /// PostRepository
    /// </summary>
    public class PostRepository : EfCoreRepository<MeowvBlogDbContext, Post, int>, IPostRepository
    {
        public PostRepository(IDbContextProvider<MeowvBlogDbContext> dbContextProvider) : base(dbContextProvider)
        {
        }
    }
}
2
3
4
5
6
7
8
9
10
11
12
13
14
15
16
17
18
//CategoryRepository.cs
using Meowv.Blog.Domain.Blog;
using Meowv.Blog.Domain.Blog.Repositories;
using Volo.Abp.Domain.Repositories.EntityFrameworkCore;
using Volo.Abp.EntityFrameworkCore;
namespace Meowv.Blog.EntityFrameworkCore.Repositories.Blog
{
    /// <summary>
    /// CategoryRepository
    /// </summary>
    public class CategoryRepository : EfCoreRepository<MeowvBlogDbContext, Category, int>, ICategoryRepository
    {
        public CategoryRepository(IDbContextProvider<MeowvBlogDbContext> dbContextProvider) : base(dbContextProvider)
        {
        }
    }
}
2
3
4
5
6
7
8
9
10
11
12
13
14
15
16
17
//TagRepository.cs
using Meowv.Blog.Domain.Blog;
using Meowv.Blog.Domain.Blog.Repositories;
using System.Collections.Generic;
using System.Threading.Tasks;
using Volo.Abp.Domain.Repositories.EntityFrameworkCore;
using Volo.Abp.EntityFrameworkCore;

namespace Meowv.Blog.EntityFrameworkCore.Repositories.Blog
{
    /// <summary>
    /// TagRepository
    /// </summary>
    public class TagRepository : EfCoreRepository<MeowvBlogDbContext, Tag, int>, ITagRepository
    {
        public TagRepository(IDbContextProvider<MeowvBlogDbContext> dbContextProvider) : base(dbContextProvider)
        {
        }

        /// <summary>
        /// 批量插入
        /// </summary>
        /// <param name="tags"></param>
        /// <returns></returns>
        public async Task BulkInsertAsync(IEnumerable<Tag> tags)
        {
            await DbContext.Set<Tag>().AddRangeAsync(tags);
            await DbContext.SaveChangesAsync();
        }
    }
}
2
3
4
5
6
7
8
9
10
11
12
13
14
15
16
17
18
19
20
21
22
23
24
25
26
27
28
29
30
31
//PostTagRepository.cs
using Meowv.Blog.Domain.Blog;
using Meowv.Blog.Domain.Blog.Repositories;
using System.Collections.Generic;
using System.Threading.Tasks;
using Volo.Abp.Domain.Repositories.EntityFrameworkCore;
using Volo.Abp.EntityFrameworkCore;

namespace Meowv.Blog.EntityFrameworkCore.Repositories.Blog
{
    /// <summary>
    /// PostTagRepository
    /// </summary>
    public class PostTagRepository : EfCoreRepository<MeowvBlogDbContext, PostTag, int>, IPostTagRepository
    {
        public PostTagRepository(IDbContextProvider<MeowvBlogDbContext> dbContextProvider) : base(dbContextProvider)
        {
        }

        /// <summary>
        /// 批量插入
        /// </summary>
        /// <param name="postTags"></param>
        /// <returns></returns>
        public async Task BulkInsertAsync(IEnumerable<PostTag> postTags)
        {
            await DbContext.Set<PostTag>().AddRangeAsync(postTags);
            await DbContext.SaveChangesAsync();
        }
    }
}
2
3
4
5
6
7
8
9
10
11
12
13
14
15
16
17
18
19
20
21
22
23
24
25
26
27
28
29
30
31
//FriendLinkRepository.cs
using Meowv.Blog.Domain.Blog;
using Meowv.Blog.Domain.Blog.Repositories;
using Volo.Abp.Domain.Repositories.EntityFrameworkCore;
using Volo.Abp.EntityFrameworkCore;

namespace Meowv.Blog.EntityFrameworkCore.Repositories.Blog
{
    /// <summary>
    /// PostTagRepository
    /// </summary>
    public class FriendLinkRepository : EfCoreRepository<MeowvBlogDbContext, FriendLink, int>, IFriendLinkRepository
    {
        public FriendLinkRepository(IDbContextProvider<MeowvBlogDbContext> dbContextProvider) : base(dbContextProvider)
        {
        }
    }
}
2
3
4
5
6
7
8
9
10
11
12
13
14
15
16
17
18
在TagRepository和PostTagRepository仓储接口的实现中,因为数据量不大,可以直接用了EF Core自带的AddRangeAsync批量保存数据。
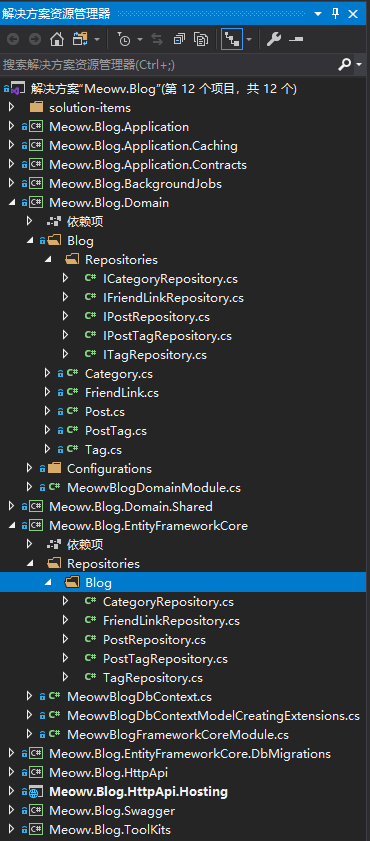
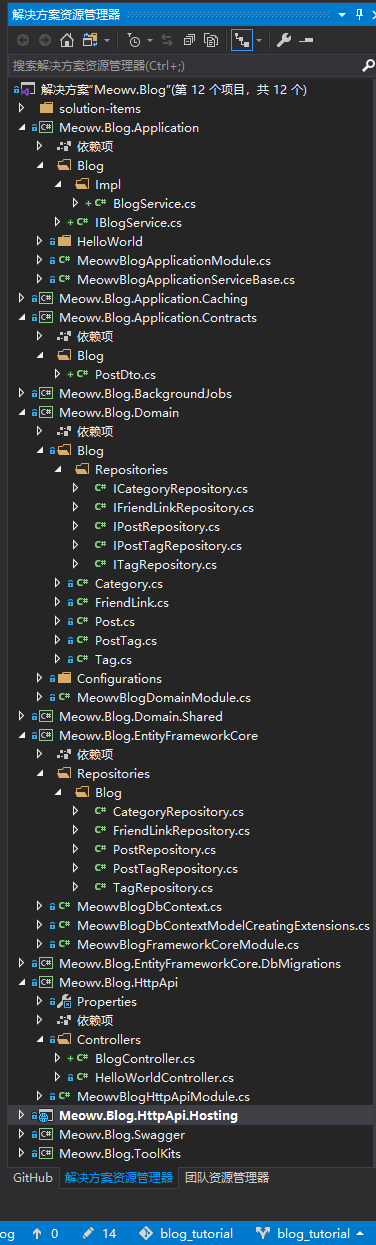
到这里,关于博客的自定义仓储便完成了,此时项目层级目录图,如下:
# 增删改查
接下来在就可以在.Application服务层愉快的玩耍了,写服务之前,我们要分析我们的项目,要有哪些功能业务。由于是博客项目,无非就是一些增删改查。今天先不写博客业务,先完成对数据库文章表meowv_posts的一个简单CRUD。
在.Application层新建Blog文件夹,添加一个IBlogService.cs博客接口服务类,分别添加增删改查四个方法。
这时就要用到我们的数据传输对象(DTO)了,简单理解,DTO就是从我们的领域模型中抽离出来的对象,它是很纯粹的只包含我们拿到的数据,不参杂任何行为逻辑。
在.Application.Contracts层新建Blog文件夹,同时新建一个PostDto.cs类,与.Domain层中的Post.cs与之对应,他们很相似,但是不一样。
于是IBlogService.cs接口服务类的CRUD为:
//IBlogService.cs
using Meowv.Blog.Application.Contracts.Blog;
using System.Threading.Tasks;

namespace Meowv.Blog.Application.Blog
{
    public interface IBlogService
    {
        Task<bool> InsertPostAsync(PostDto dto);

        Task<bool> DeletePostAsync(int id);

        Task<bool> UpdatePostAsync(int id, PostDto dto);

        Task<PostDto> GetPostAsync(int id);
    }
}
2
3
4
5
6
7
8
9
10
11
12
13
14
15
16
17
接口写好了,少不了实现方式,直接在Blog文件夹新建Impl文件夹,用来存放我们的接口实现类BlogService.cs,注意:都是以Service结尾的噢~
实现服务接口除了要继承我们的IBlogService外,不要忘了还需依赖我们的ServiceBase类。由于我们之前直接接入了Autofac,可以直接使用构造函数依赖注入的方式。
//BlogService.cs
using Meowv.Blog.Application.Contracts.Blog;
using Meowv.Blog.Domain.Blog.Repositories;
using System;
using System.Threading.Tasks;

namespace Meowv.Blog.Application.Blog.Impl
{
    public class BlogService : ServiceBase, IBlogService
    {
        private readonly IPostRepository _postRepository;

        public BlogService(IPostRepository postRepository)
        {
            _postRepository = postRepository;
        }
        ...
    }
}
2
3
4
5
6
7
8
9
10
11
12
13
14
15
16
17
18
19
现在就可以实现我们写的IBlogService接口了。
先写添加,这里实现方式全采用异步的方法,先构建一个Post实体对象,具体内容参数都从PostDto中获取,由于主键之前设置了自增,这里就不用管它了。然后调用 await _postRepository.InsertAsync(entity);,正好它返回了一个创建成功的Post对象,那么我们就可以判断对象是否为空,从而确定文章是否添加成功。
代码如下:
...
        public async Task<bool> InsertPostAsync(PostDto dto)
        {
            var entity = new Post
            {
                Title = dto.Title,
                Author = dto.Author,
                Url = dto.Url,
                Html = dto.Html,
                Markdown = dto.Markdown,
                CategoryId = dto.CategoryId,
                CreationTime = dto.CreationTime
            };

            var post = await _postRepository.InsertAsync(entity);
            return post != null;
        }
...
2
3
4
5
6
7
8
9
10
11
12
13
14
15
16
17
18
然后在.HttpApi层和之前添加HelloWorldController一样,添加BlogController。调用写的InsertPostAsync方法,如下:
//BlogController.cs
using Meowv.Blog.Application.Blog;
using Meowv.Blog.Application.Contracts.Blog;
using Microsoft.AspNetCore.Mvc;
using System.Threading.Tasks;
using Volo.Abp.AspNetCore.Mvc;

namespace Meowv.Blog.HttpApi.Controllers
{
    [ApiController]
    [Route("[controller]")]
    public class BlogController : AbpController
    {
        private readonly IBlogService _blogService;

        public BlogController(IBlogService blogService)
        {
            _blogService = blogService;
        }

        /// <summary>
        /// 添加博客
        /// </summary>
        /// <param name="dto"></param>
        /// <returns></returns>
        [HttpPost]
        public async Task<bool> InsertPostAsync([FromBody] PostDto dto)
        {
            return await _blogService.InsertPostAsync(dto);
        }
    }
}
2
3
4
5
6
7
8
9
10
11
12
13
14
15
16
17
18
19
20
21
22
23
24
25
26
27
28
29
30
31
32
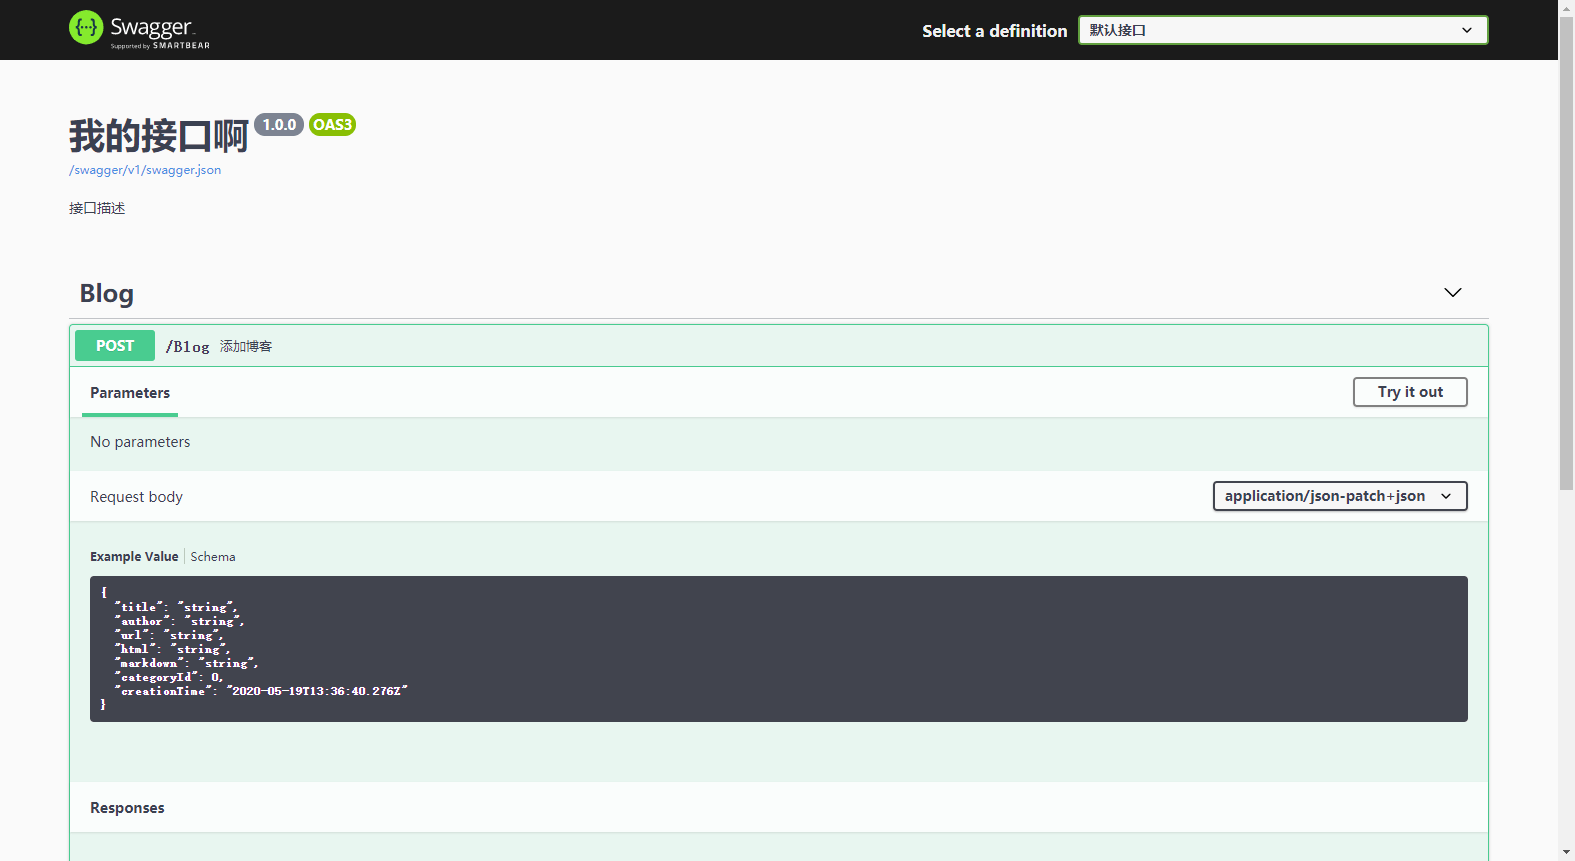
添加博客操作,我们将其设置为[HttpPost]方式来提交,因为现在开发接口api,都要遵循RESTful方式,所以就不用给他指定路由了,[FromBody]的意思是在请求正文中以JSON的方式来提交参数。
完成上述操作,打开我们的Swagger文档看看, .../swagger/index.html ,已经出现我们的接口了。
随手就试一下这个接口,能否成功创建文章。

可以看到数据库已经躺着我们刚刚添加数据内容。
将剩下的三个接口一一实现,相信大家肯定都知道怎么写了。就不逐一唠叨了,代码如下:
...
        public async Task<bool> DeletePostAsync(int id)
        {
            await _postRepository.DeleteAsync(id);

            return true;
        }

        public async Task<bool> UpdatePostAsync(int id, PostDto dto)
        {
            var post = await _postRepository.GetAsync(id);

            post.Title = dto.Title;
            post.Author = dto.Author;
            post.Url = dto.Url;
            post.Html = dto.Html;
            post.Markdown = dto.Markdown;
            post.CategoryId = dto.CategoryId;
            post.CreationTime = dto.CreationTime;

            await _postRepository.UpdateAsync(post);

            return true;
        }

        public async Task<PostDto> GetPostAsync(int id)
        {
            var post = await _postRepository.GetAsync(id);

            return new PostDto
            {
                Title = post.Title,
                Author = post.Author,
                Url = post.Url,
                Html = post.Html,
                Markdown = post.Markdown,
                CategoryId = post.CategoryId,
                CreationTime = post.CreationTime
            };
        }
...
2
3
4
5
6
7
8
9
10
11
12
13
14
15
16
17
18
19
20
21
22
23
24
25
26
27
28
29
30
31
32
33
34
35
36
37
38
39
40
41
在这里先暂时不做参数校验,咱们默认都是正常操作,如果执行操作成功,直接返回true。大家会发现,当我们使用了DTO后,写了大量对象的转换,在这里暂不做优化,将在后续业务开始后使用AutoMapper处理对象映射。如果大家感兴趣可以自己先试一下。
在Controller中调用,代码如下:
...
        /// <summary>
        /// 删除博客
        /// </summary>
        /// <param name="id"></param>
        /// <returns></returns>
        [HttpDelete]
        public async Task<bool> DeletePostAsync([Required] int id)
        {
            return await _blogService.DeletePostAsync(id);
        }

        /// <summary>
        /// 更新博客
        /// </summary>
        /// <param name="id"></param>
        /// <param name="dto"></param>
        /// <returns></returns>
        [HttpPut]
        public async Task<bool> UpdatePostAsync([Required] int id, [FromBody] PostDto dto)
        {
            return await _blogService.UpdatePostAsync(id, dto);
        }

        /// <summary>
        /// 查询博客
        /// </summary>
        /// <param name="id"></param>
        /// <returns></returns>
        [HttpGet]
        public async Task<PostDto> GetPostAsync([Required] int id)
        {
            return await _blogService.GetPostAsync(id);
        }
...
2
3
4
5
6
7
8
9
10
11
12
13
14
15
16
17
18
19
20
21
22
23
24
25
26
27
28
29
30
31
32
33
34
35
DeletePostAsync:指定了请求方式[HttpDelete],参数id为必填项
UpdatePostAsync:指定了请求方式[HttpPut],参数id为必填项并且为url的一部分,要更新的具体内容和添加博客的方法InsertPostAsync的一样的
GetPostAsync:指定了请求方式[HttpGet],参数id为必填项
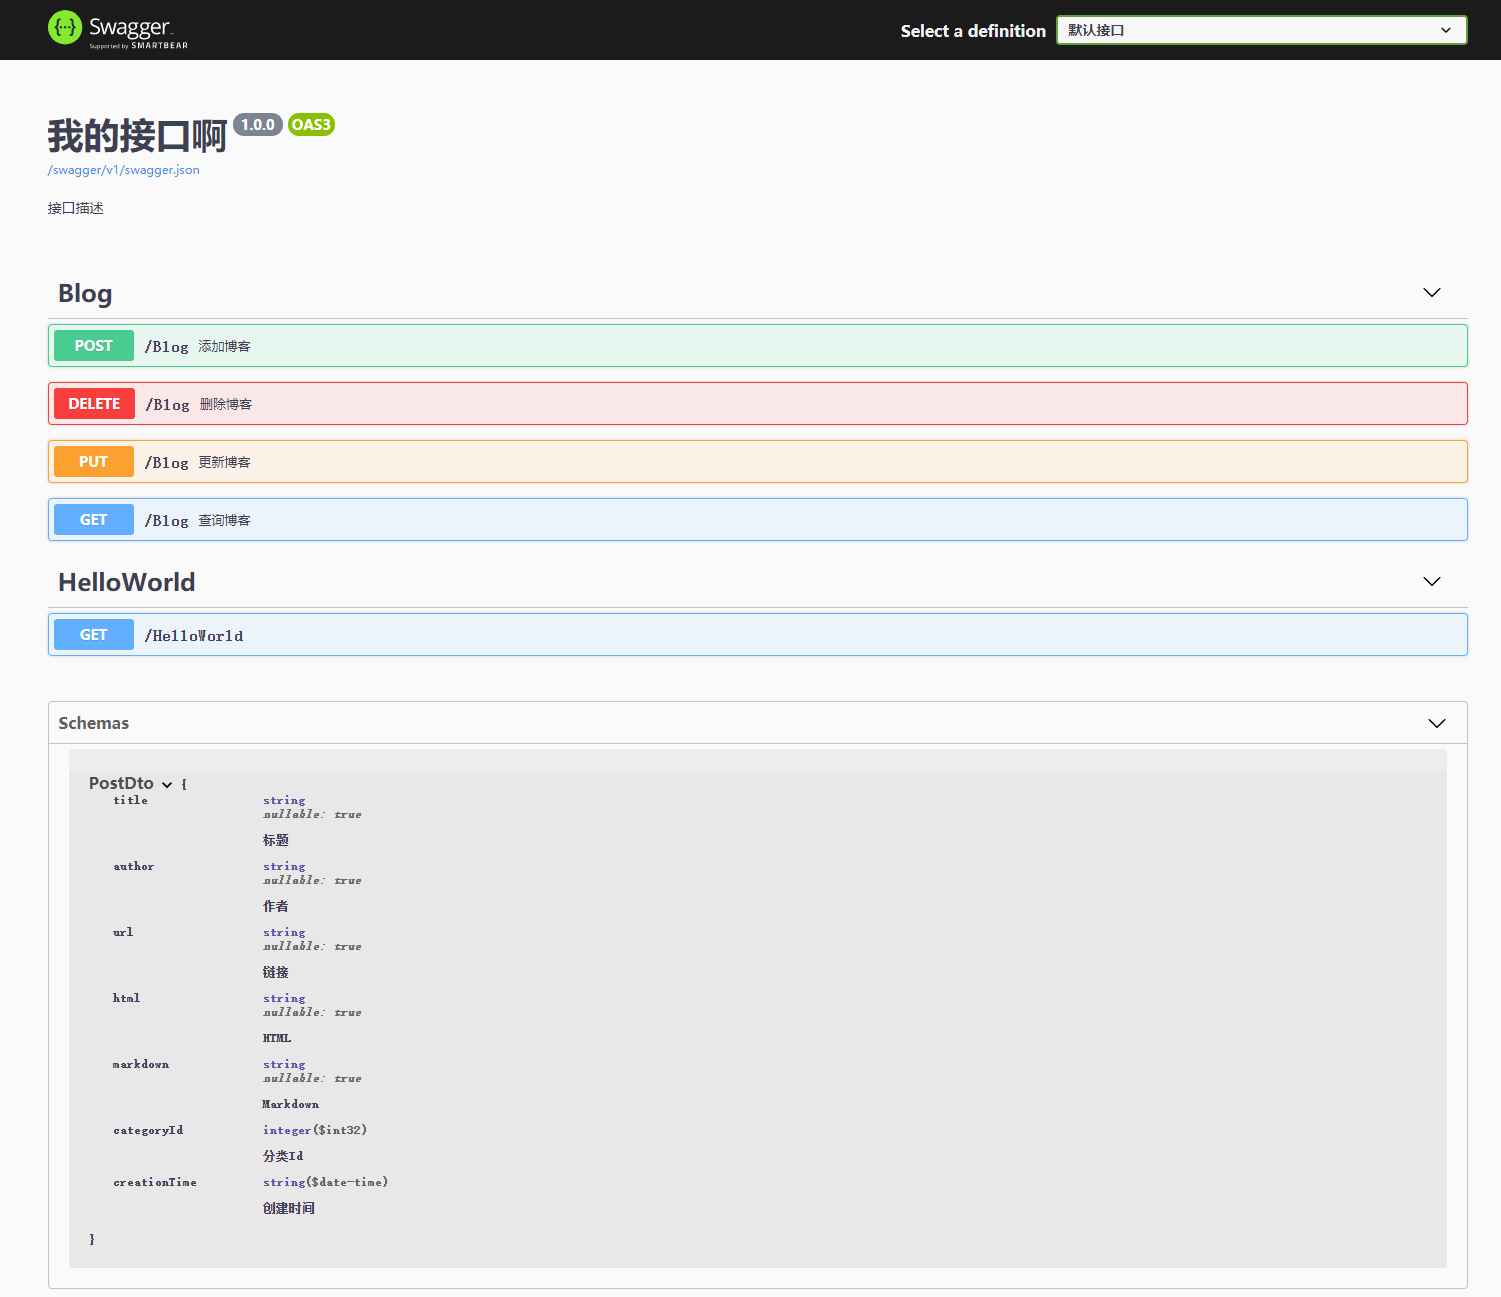
ok,打开Swagger文档看看效果,并试试我们的接口是否好使吧,反正我试了是没有问题的。
做到这一步的项目层级目录如下:
本篇使用自定义仓储的方式完成了对博客(meowv_posts)的增删改查,你学会了吗?😁😁😁